转载: https://blog.csdn.net/wanzheng_96/article/details/103141273
总结python源文件编译、反编译、加密混淆


一、编译
提示:编译过程中所有文件路径最好不要出现中文
1. 编译为 pyc
说明
-
pyc 是由 py 文件经过编译后生成的二进制字节码(byte code)文件;
-
pyc 文件的加载速度比 py 文件快;
-
pyc 文件是一种跨平台的字节码,由 python 的虚拟机来执行;
-
pyc 文件的内容跟 python 版本相关,不同的 python 版本编译生成不同的 pyc 文件,只能在相同版本环境下执行;
-
.pyc 文件结构介绍参考:https://www.iteye.com/topic/382423、https://yq.aliyun.com/articles/599833#
.pyc 文件的前 8 个字节含义:- 四个字节的 magic number - 四个字节的 timestamp- 1
- 2
头四个是 magic number 很多 pyc 都在这个上面做文章,这修改成不合法的,然后你反编译就是败了,你可以找你自己编译成功的 pyc 头直接覆盖掉他的头 8 个字节就可以了, timestamp 是文件的修改时间,主要是当源码有改变的时候 python 就可以重新生成 pyc 文件.
编译方法
利用compileall和py_compile来预编译 python 代码:
这两个从某种意义上是互通的,python 预装了这两个东西,
python -m compileall test.py #把单个.py文件编译为字节码文件
python -m compileall /path/src/ #批量生成字节码文件,/path/src/是包含.py文件名的路径

python -m py_compile test.py #把单个.py文件编译为字节码文件
python -m py_compile /path/src/ #批量生成字节码文件,仅将/path/src/的下一层.py文件编译,不会递归执行
- 1
- 2
- 3
- 4
- 5
上面的 py_compile 针对文件夹是会有一些问题,但理论上这种语法应该是可以的。
可根据项目需要写成编译脚本:
- compileall
对于 compileall 更详细的参数以及命令解析可以参考的链接:https://docs.python.org/3/library/compileall.html
import compileall # compileall.compile_file编译单个文件; compileall.compile_file('main.py') #compile_dir 函数编译文件夹下的py文件 compileall.compile_dir('Lib/', force=True) # 使用多处理器编译 compileall.compile_dir('Lib/', workers=2) # Perform same compilation, excluding files in .svn directories. import re
compileall.compile_dir('Lib/', rx=re.compile(r'[/\\][.]svn'), force=True) # pathlib.Path objects can also be used. import pathlib
compileall.compile_dir(pathlib.Path('Lib/'), force=True)
- 1
- 2
- 3
- 4
- 5
- 6
- 7
- 8
- 9
- 10
- 11
- 12
- 13
- 14
- 15
- 16
- 17
- 18
- py_compile
函数原型:
py_compile.compile(file, cfile=None, dfile=None, doraise=False, optimize=-1, invalidation_mode=None):
- file: 表示需要编译的 py 文件的路径
- cfile: 表示编译后的 pyc 文件名称和路径,默认为直接在 file 文件名后加 c 或者 o,o 表示优化的字节码
- dfile: 错误消息保存的路径,默认为源文件名
- doraise: 如果为True,编译发生错误时则会引发一个 PyCompileError; 如果为False, 编译文件出错时,则会有输出一个错误信息,而不会引发异常
- optimize: 编译优化等级,可取-1, 0, 1, 2. 值-1 表示使用当前解释器的优化等级,就像命令行参数-O 的个数。
import py_compile

py_compile.compile(r'Downloads/md5.py') 'Downloads/__pycache__/md5.cpython-37.pyc'
- 1
- 2
- 3
- 4
使用
与 py 文件一样使用,最好将文件名中间类似 cpython-36 的部分去掉,否则可能出现导包错误 ModuleNotFoundError:
2. 编译为 pyo 或者 opt-n.pyc 文件
说明
源代码文件经过优化编译后生成的文件,无法用文本编辑器进行编辑
Python3.5 之后,不再使用.pyo 文件名,而是使用类似“xxx.opt-n.pyc 的文件名;
编译成 pyc 和 pyo 本质上和 py 没有太大区别,只是对于这个模块的加载速度提高了,并没有提高代码的执行速度。
编译方法
pyo 文件其实很简单,就是上面 pyc 命令的改版:
python -O -m py_compile file.py
python -O -m py_compile /path/src/
python -O -m compileall file.py
python -O -m compileall /path/src/

或者
python -OO -m py_compile file.py
python -OO -m py_compile /path/src/
python -OO -m compileall file.py
python -OO -m compileall /path/src/
- 1
- 2
- 3
- 4
- 5
- 6
- 7
- 8
- 9
- 10
运行
与 py 文件一样运行、导入
python sample.cpython-36.pyo
- 1
from sample import *
- 1
3. 编译成 pyd 或 so 链接库
说明
pyd 格式是 D 语言(C/C++综合进化版本)生成的二进制文件,是 python 的动态链接库;
参考信息:https://docs.python.org/3/faq/windows.html?highlight=pyd#is-a-pyd-file-the-same-as-a-dll
windows 编译环境鄙人用的 Visual Studio 2019
编译方法一
Cython
利用 Cython 模块,根据编译环境不同生成不同文件。
- 前提安装 Cython
pip intall Cython
- 1
- 编辑一个 setup.py 文件,写入以下代码并运行
注意:程序所在的目录路径不能包含中文文字
# 脚本文件 from distutils.core import setup from Cython.Build import cythonize

setup( name = 'Hello world app', ext_modules = cythonize("test.py"), )
- 1
- 2
- 3
- 4
- 5
- 6
- 7
- 8
- 9
然后我们就退回到目录下运行命令,就会在 windows 上生成 pyd 文件,或者 linux 上生成 so 文件:
python setup.py build_ext --inplace
- 1
- build_ext 是指明 python 生成 C/C++的扩展模块(build C/C++ extensions
- –inplace 的意思是在当前文件目录下生成.pyd 文件,不加这一句就会在 build 文件夹中生成
最终生成如下文件:
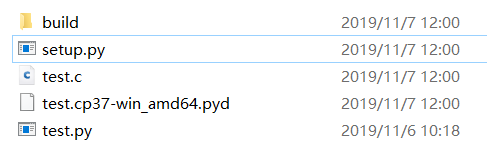
其中,build 是生成过程使用到的临时文件。test.c 也是临时文件
注:可能会出现“Unable to find vcvarsall.bat”错误

参考这里
附:编译选定文件夹下所有 py 文件脚本
import os import re import shutil from distutils.core import Extension, setup from Cython.Build import cythonize from Cython.Compiler import Options # __file__ 含有魔术变量的应当排除,Cython虽有个编译参数,但只能设置静态。 exclude_so = ['__init__.py'] sources = ['.'] # 选定文件夹 extensions = [] for source in sources: # 递归遍历文件夹(深度优先) for dirpath, foldernames, filenames in os.walk(source): # 删除pyc文件 if '__pycache__' in foldernames: foldernames.remove('__pycache__') shutil.rmtree(os.path.join(dirpath, '__pycache__')) for filename in filter(lambda x: re.match(r'.*[.]py$', x), filenames): file_path = os.path.join(dirpath, filename) print(file_path, end='\t') if filename not in exclude_so: temp = re.sub(r'[/\\]', '.', file_path[:-3]).strip('.') print(temp) extensions.append( Extension(temp, [file_path], extra_compile_args=["-Os", "-g0"], extra_link_args=["-Wl,--strip-all"])) Options.docstrings = False compiler_directives = {'optimize.unpack_method_calls': False} setup( # cythonize的exclude全路径匹配,不灵活,不如在上一步排除。 # language_level是python的主版本号 ext_modules=cythonize(extensions, exclude=None, nthreads=20, quiet=True, build_dir='./build', language_level=3, compiler_directives=compiler_directives))

- 1
- 2
- 3
- 4
- 5
- 6
- 7
- 8
- 9
- 10
- 11
- 12
- 13
- 14
- 15
- 16
- 17
- 18
- 19
- 20
- 21
- 22
- 23
- 24
- 25
- 26
- 27
- 28
- 29
- 30
- 31
- 32
- 33
- 34
- 35
- 36
编译方法二
安装 easycython
这个最方便只要一行代码就可以搞定。
https://github.com/cjrh/easycython
pip install easycython
- 1
这个模块也会自动安装依赖的 cython
转换步骤
将 .py 文件重命名为.pyx
运行命令
easycython *.pyx
- 1
上面会将当前文件夹下所有的.pyx 文件生成为.pyd (Linux 下是.so)

html 文件可以查看 .py 文件与 .c 文件的转换对照关系。

编译方法三
Nuitka:用户手册
100%兼容标准 python2/python3,静态编译你的 python 程序
鄙人还没来得及仔细研究。。。
使用建议
同样的,最好重命名 pyd 文件名,将中间的部分删除,前后部分不要动
可以通过import test使用该文件
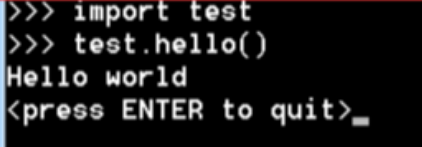
个人建议:将核心的代码编译为 pyd 或者 so 文件,然后再写一个简单的 main.py 去 import 调用这些链接库文件,达到隐藏核心代码的作用。
另外,cython 在 jupyter notebook 里使用真的很刺激 😱😱

关于 cython 与 python 混合编程的使用可以参考:
- http://docs.cython.org/en/latest/src/quickstart/overview.html
- https://blog.csdn.net/g6uqwseseo/article/details/71439453?locationNum=11&fps=1
二、打包
各种打包工具的对比如下(来自文章Freezing Your Code)
| Solution | Windows | Linux | OS X | Python 3 | License | One-file mode | Zipfile import | Eggs | pkg_resources support |
|---|---|---|---|---|---|---|---|---|---|
| bbFreeze | yes | yes | yes | no | MIT | no | yes | yes | yes |
| py2exe | yes | no | no | yes | MIT | yes | yes | no | no |
| pyInstaller | yes | yes | yes | no | GPL | yes | no | yes | no |
| cx_Freeze | yes | yes | yes | yes | PSF | no | yes | yes | no |
| py2app | no | no | yes | yes | MIT | no | yes | yes | yes |
其中 pyInstaller 和 cx_Freeze 都是不错的,stackoverflow 上也有人建议用 cx_Freeze,说是更便捷些。pkg_resources 新版的 pyInstaller 貌似是支持的。
1. PyInstaller
说明
PyInstaller 的原理简介
PyInstaller 其实就是把 python 解析器和你自己的脚本打包成一个可执行的文件,和编译成真正的机器码完全是两回事,所以千万不要指望成打包成一个可执行文件会提高运行效率,相反可能会降低运行效率,好处就是在运行者的机器上不用安装 python 和你的脚本依赖的库。在 Linux 操作系统下,它主要用的 binutil 工具包里面的 ldd 和 objdump 命令。
PyInstaller 输入你指定的的脚本,首先分析脚本所依赖的其他脚本,然后去查找,复制,把所有相关的脚本收集起来,包括 Python 解析器,然后把这些文件放在一个目录下,或者打包进一个可执行文件里面。
使用方法
-
安装
pip install pyinstaller- 1
-
PyInstaller 支持的常用选项
-
-h,–help 查看该模块的帮助信息
-
-F,-onefile 产生单个的可执行文件
-
-D,–onedir 产生一个目录(包含多个文件)作为可执行程序
-
-w,–windowed,–noconsolc 指定程序运行时不显示命令行窗口(仅对 Windows 有效)
-
-a,–ascii 不包含 Unicode 字符集支持
-
-d,–debug 产生 debug 版本的可执行文件
-
-c,–nowindowed,–console 指定使用命令行窗口运行程序(仅对 Windows 有效)
-
-o DIR,–out=DIR 指定 spec 文件的生成目录。如果没有指定,则默认使用当前目录来生成 spec 文件
-
-p DIR,–path=DIR 设置 Python 导入模块的路径(和设置 PYTHONPATH 环境变量的作用相似)。也可使用路径分隔符(Windows 使用分号,Linux 使用冒号)来分隔多个路径
-
-n NAME,–name=NAME 指定项目(产生的 spec)名字。如果省略该选项,那么第一个脚本的主文件名将作为 spec 的名字
了解 PyInstaller 选项的详细信息,可通过 pyinstaller -h 来查看。
-
-
基本用法:
-
指定打包成单个可执行的 exe 文件
pyinstaller -F test.py -
指定打包生成一个目录(包含多个文件)来作为程序
pyinstaller -D test.py - 通过结合-w 参数不生成命令行界面 及 在代码中结合 tkiner 模块构建 来实现图形用户界面程序。
当生成完成后,将会在此目录下看到多了一个 dist 目录,并在该目录下看到有一个 test.exe 文件
-
指定打包成单个可执行的 exe 文件
2. 压缩成 pyz
说明
从 Python 3.5 开始,定义了.pyz 和.pyzw 分别作为“Python Zip 应用”和“Windows 下 Python Zip 应用”的扩展名。
新增了内置 zipapp 模块来进行简单的管理,可以用 Zip 打包成 Python 程序解释器可直接执行.pyz 的文件。
-
可以用解压缩软件直接打开,并查看源码,此方式没有任何加密作用, 甚至还降低了运行效率。
-
不能将 python 解释器一起打包,所以不能单独发布、运行。可以通过 pip 的–target 参数将依赖包添加进去,并且打包时指定运行该 pyz 文件的解释器路径,然后在 linux 上(默认已经安装了 python) 赋予运行权限+x,就能直接运行,但是 Windows 下需要额外的 python.dll 链接文件才可。
-
更多注意事项参考:zipapp — Manage executable python zip archives
https://docs.python.org/3/library/zipapp.html
详细内容请见 PEP441(https://www.python.org/dev/peps/pep-0441/)
Python API:(参数说明见官方文档)
zipapp.create_archive(source, target=None, interpreter=None, main=None, filter=None, compressed=False
- 1
基本用法
shell 基本用法:
$ python -m zipapp source [options]
- 1
-
source 参数:
代表要打包的 Python 源程序或目录,该参数既可以是单个的 Python 文件,也可以是文件夹。 如果是文件夹,那么 zipapp 模块会打包该文件夹中的所有 Python 文件。
[options]参数选项:
-
-o , --output=<output>
将输出写入名为 output 的文件。如果未指定此选项,则输出文件名将与输入源相同,并带有扩展名.pyz。如果给出了明确的文件名,则按原样使用(因此,如果需要,应包括.pyz 扩展名)。
如果源是 .pyz 文件,则必须指定输出文件名(在这种情况下,输出不得与源文件相同) -
-p <interpreter>, --python=<interpreter>
在首行添加#!指定解释器作为运行命令。另外,在 POSIX 上,使归档文件可执行。默认为不写#!首行,并且不使文件可执行。
-
-m <mainfn>, --main=<mainfn>
指定的程序入口 “模块名:函数名” 需要用 双引号 括起来,单引号则报错。 如果不指定该选项,则默认从模块中的 __main__.py 文件开始执行。
复制 pyz 时无法指定–main。 -
-c, --compress
使用 deflate 方法压缩文件,以减小输出文件的大小。默认情况下,文件未压缩地存储在存档中。
–compress 在复制档案时无效。
New in version 3.7.
-
–info
显示嵌入在归档文件中的解释器,以进行诊断。在这种情况下,任何其他选项都将被忽略,并且 SOURCE 必须是归档文件,而不是目录。 -
-h, --help
Print a short usage message and exit.
打包示例
python -m zipapp app -m "app:main"
- 1
即:指定将当前目录下的 app 子目录下的所有 Python 源文件打包成一个档案包,
并通过-m 选项指定使用 app.py 模块中的 main 函数作为程序入口。
如果不指定该-m 选项,则默认从模块中的 __main__.py 文件开始执行。
用代码实现相同效果:
import zipapp
zipapp.create_archive('app', 'app.pyz', main='app:main')
- 1
- 2
- 使应用程序直接在 POSIX 上可执行,指定要使用的解释器(效果如同在首行写入!# /usr/bin/python)。
python -m zipapp myapp -p "/usr/bin/env python"
- 1
- 修改现有 pyz 文件:
import zipapp
zipapp.create_archive('old_archive.pyz', 'new_archive.pyz', '/usr/bin/python3')
- 1
- 2
- 其他用法
import zipapp import io
temp = io.BytesIO() zipapp.create_archive('myapp.pyz', temp, '/usr/bin/python2') with open('myapp.pyz', 'wb') as f: f.write(temp.getvalue())
- 1
- 2
- 3
- 4
- 5
- 6
- 7
使用
$ python3 app.pyz
- 1
如果在打包时指定了解释器路径,就可以这样:
sudo chmod +x app.pyz
./app.pyz
- 1
- 2
三、反编译
1. pyc 、pyo 文件反编译
在线网站:https://tool.lu/pyc/
(效果好像不太好)
uncompyle6
是 decompyle, uncompyle, and uncompyle2 的继承者,个人感觉效果不错。
-
https://github.com/rocky/python-uncompyle6
- 安装
pip install uncompyle6- 1
-
使用
将 models.pyc 反编译成 py 文件
uncompyle6 models.pyc > models.py- 1
递归将/usr/lib/python1.5 文件夹中所有的 .pyc 文件反编译并保存到/tmp
uncompyle6 -r -o /tmp /usr/lib/python1.5- 1
反编译后的效果可以说很理想,如果你的代码格式符合 PEP8 规范的要求,那就基本和源来的文件一样,不过各种注释就没有了。
查看更多用法:
uncompyle6 --help
Usage: uncompyle6 [OPTIONS]... [ FILE | DIR]... uncompyle6 [--help | -h | --V | --version] Examples: uncompyle6 foo.pyc bar.pyc # decompile foo.pyc, bar.pyc to stdout uncompyle6 -o . foo.pyc bar.pyc # decompile to ./foo.pyc_dis and ./bar.pyc_dis uncompyle6 -o /tmp /usr/lib/python1.5 # decompile whole library Options: -o <path> output decompiled files to this path: if multiple input files are decompiled, the common prefix is stripped from these names and the remainder appended to <path> uncompyle6 -o /tmp bla/fasel.pyc bla/foo.pyc -> /tmp/fasel.pyc_dis, /tmp/foo.pyc_dis uncompyle6 -o /tmp bla/fasel.pyc bar/foo.pyc -> /tmp/bla/fasel.pyc_dis, /tmp/bar/foo.pyc_dis uncompyle6 -o /tmp /usr/lib/python1.5 -> /tmp/smtplib.pyc_dis ... /tmp/lib-tk/FixTk.pyc_dis --compile | -c <python-file> attempts a decompilation after compiling <python-file> -d print timestamps -p <integer> use <integer> number of processes -r recurse directories looking for .pyc and .pyo files --fragments use fragments deparser --verify compare generated source with input byte-code --verify-run compile generated source, run it and check exit code --syntax-verify compile generated source --linemaps generated line number correspondencies between byte-code and generated source output --encoding <encoding> use <encoding> in generated source according to pep-0263 --help show this message Debugging Options: --asm | -a include byte-code (disables --verify) --grammar | -g show matching grammar --tree={before|after} -t {before|after} include syntax before (or after) tree transformation (disables --verify) --tree++ | -T add template rules to --tree=before when possible Extensions of generated files: '.pyc_dis' '.pyo_dis' successfully decompiled (and verified if --verify) + '_unverified' successfully decompile but --verify failed + '_failed' decompile failed (contact author for enhancement)- 1
- 2
- 3
- 4
- 5
- 6
- 7
- 8
- 9
- 10
- 11
- 12
- 13
- 14
- 15
- 16
- 17
- 18
- 19
- 20
- 21
- 22
- 23
- 24
- 25
- 26
- 27
- 28
- 29
- 30
- 31
- 32
- 33
- 34
- 35
- 36
- 37
- 38
- 39
- 40
- 41
- 42
- 43
- 44
- 45
- 46
- 47
- 48
其他 Python 反编译工具 uncompyle2, decompyle2, DePython, unpyc, uncompyle, pycdc
Decompyle++
A Python Byte-code Disassembler/Decompiler
https://github.com/zrax/pycdc
Easy Python Decompiler
Easy Python Decompiler is python bytecode decompiler, decompiles pyc & pyo files.
https://sourceforge.net/projects/easypythondecompiler/
2. exe 反编译
针对 pyinstaller 打包的程序破解:
假如源程序生成过程如下:
pyinstaller -F main.py
- 1
生成了 main.exe
工具:pyinstxtractor 下载连接
还原步骤:
1)将 pyinstxtractor.py 和将要还原的 xxx.exe 文件放在同一个目录下;
2)运行以下命令:
python pyinstxtractor.py main.exe
- 1
如果成功执行,将在同目录下生成新的反编译文件夹——main.exe_extracted
3)接着使用 010 editor 或者 winhex 软件打开文件夹里面的两个文件,一个是没有任何后缀的主程序(此处是 main)文件和一个 struct 文件。
4)将 struct 文件里的前 8 个字节(magic 和时间戳)复制到 main 文件里,如果使用的是 010 editor 软件,先在 main 文件开头插入 8 个空白字节,再从 struct 文件复制粘贴过来。
5)参考上文反编译 pyc 过程将 main 文件反编译为 py 文件。
四、混淆加密
参考文章:
1. 代码混淆
如果代码被混淆到一定程度,连作者看着都费劲的话,是不是也能达到保护源码的目的呢?
既然我们的目的是混淆,就是通过一系列的转换,让代码逐渐不让人那么容易明白,那就可以这样下手:
- 移除注释和文档。没有这些说明,在一些关键逻辑上就没那么容易明白了。
- 改变缩进。完美的缩进看着才舒服,如果缩进忽长忽短,看着也一定闹心。
- 在 tokens 中间加入一定空格。这就和改变缩进的效果差不多。
- 重命名函数、类、变量。命名直接影响了可读性,乱七八糟的名字可是阅读理解的一大障碍。
- 在空白行插入无效代码。这就是障眼法,用无关代码来打乱阅读节奏。
1.1 在线网站:http://pyob.oxyry.com/
使用方法
下拉菜单选择混淆方式,还有底部的选项,将代码填到左侧文本框,点击上方红色按钮,即可生成。

说明
此方式仅仅是将变量替换为 O 、0 组合的字符串,让人难以直接阅读,但是代码结构以及导入的包名没变,将这些 0O 组合的变量名做简单替换,再通过 debug 等方式还是能了解代码的整体运行流程的。
可以再配合其他加密方式,增加破解难度,哈哈。
这个混淆算法也可以自己实现。QAQ
1.2 Intensio-Obfuscator
Intensio-Obfuscator 可以直接将 Python 源代码进行转换,并输出经过混淆处理后的 Python 代码。它会自动将变量名、类名以及函数名替换为随机字符,并定义长度,移除注释内容,自动换行,并给每一行代码增加随机脚本(所有的随机值都是不同的)。
支持的 Python 文件代码版本为 v2.x 以及 v3.x 版本.
功能介绍
- 替换:替换所有的变量名、类名以及函数名,移除所有的换行符
- 填充:在每一行代码后添加随机脚本,并移除所有的换行符
- 移除:移除代码中的全部注释以及换行
- 低级混淆:生成 32 个字符的随机字符串,替换源代码中定义的变量名、类名以及函数名
- 中级混淆:生成 64 个字符的随机字符串,替换源代码中定义的变量名、类名以及函数名
- 高级混淆:生成 128 个字符的随机字符串,替换源代码中定义的变量名、类名以及函数名
工具使用
git clone https://github.com/Hnfull/Intensio-Obfuscator.git
pip3 install -r Intensio-Obfuscator/requirements.txt
cd Intensio-Obfuscator/intensio/

python intensio_obfuscator.py --help
- 1
- 2
- 3
- 4
- 5
| 参数 | 描述 |
|---|---|
| -h, –help | 显示帮助菜单 |
| -f, –onefile | 指定一个代码文件 |
| -d, –multiplefiles | 指定多个代码文件(项目) |
| -i, –input | 源文件或目录 |
| -c, –code | 输入文件或目录中使用的语言,默认值为[python] |
| -o, –output | 混淆处理后的输出文件或目录 |
| -m, –mixer | 输出变量混淆的字符数量/长度,默认值为: [medium],可选项为: [lower, medium, high] |
| -r, –replace | 激活“替换”混淆功能 |
| -p, –padding | 激活“填充”混淆功能 |
| -rm, –remove | 激活“移除”混淆功能 |
工具使用样例
python3.xintensio_obfuscator.py -d -i test/python/multiplefiles/basic/input/basicRAT -cpython -o test/python/multiplefiles/basic/output/basicRAT -m lower -r –rm
python3.xintensio_obfuscator.py -d -i test/python/multiplefiles/advanced/input/basicRAT-c python -o test/python/multiplefiles/advanced/output/basicRAT -m high -r -p-rm
1.3 pyminifier
1.4 Opy
Github
OPY - Obfuscator for Python, string obfuscation added
1.5 pyobfuscate
pyobfuscate 算是一个颇具年头的 Python 代码混淆库了,但却是“老当益壮”了。
(一次只能混淆一个文件,好像只能用于 python 2)
git clone https://github.com/astrand/pyobfuscate.git
cd pyobfuscate/
python setup.py install
# 使用
pyobfuscate example.py
- 1
- 2
- 3
- 4
- 5
2.加密
推荐阅读 :如何保护你的 Python 代码 —— 现有加密方案
定制 python 解释器
从源码下手:https://github.com/python/cpython/tree/3.6/Modules
假定我们有一个算法,能够加密原始的 Python 代码,这些加密后代码随发行程序一起,可被任何人看到,却难以破解。另一方面,有一个定制好的 Python 解释器,它能够解密这些被加密的代码,然后解释执行。而由于 Python 解释器本身是二进制文件,人们也就无法从解释器中获取解密的关键数据。从而达到了保护源码的目的。
要实现上述的设想,首先需要掌握基本的加解密算法,其次探究 Python 执行代码的方式从而了解在何处进行加解密,最后禁用字节码用以防止通过 .pyc 反编译。
详细内容见:如何保护你的 Python 代码 —— 定制 Python 解释器
修改 opcode
其实还是定制 python 解释器,只不过相对简单一些。
博客原文不方便转载,详细步骤见其他转载连接:https://blog.51cto.com/juispan/2065568
博主是 3.5.3 版本的环境,本人在 3.7 环境下已经不能正常编译了,原程序应该需要改动,本人没做深入研究,到此只提供一种加密思路,如有成功的朋友还望告知此方法使用的注意事项。
PyArmor
(收费版 266RMB)
保护 Python 脚本的工具,能够加密 Python 脚本,保护运行时刻的 Python 代码不被泄露,设置加密脚本的有效期限,绑定加密脚本到硬盘、网卡等硬件设备。
PyArmor 使用动态代码生成和交叉保护机制来保证加密脚本的安全性
它的保障机制主要包括:
- 加密编译后的代码块,保护模块中的字符串和常量
- 在脚本运行时候动态加密和解密代码块的二进制代码
- 代码块执行完成之后清空堆栈局部变量
- 通过授权文件限制加密后脚本的有效期和设备环境
参考文章:
原创文章,转载请注明出处:http://124.221.219.47/article/7461/